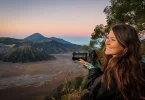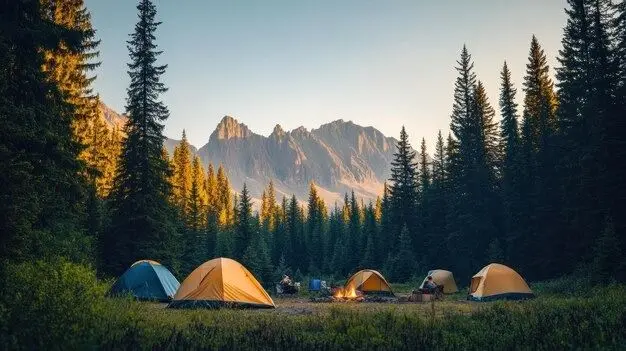

Travel photography is one of the best ways to save your travel memories. A photo can remind you of a place, a person, a road, a meal, or a special moment from your trip. When you look at that photo after many years, it can bring back the same feeling again.
Many people think travel photography needs an expensive camera. But this is not true. You can take beautiful travel photos with a mobile phone too. The main thing is not the camera. The main thing is how you use light, angle, timing, background, and story.
A good travel photo is not always perfect. It does not always need to look like a magazine picture. A good travel photo should feel real. It should show the beauty of the place and the mood of the moment.
In this guide, you will learn simple and useful travel photography tips. These tips are easy to follow. You can use them with a phone or a camera. These ideas will help you take better photos on your next trip.
What Is Travel Photography?
Travel photography means taking photos during your journey. It can include many things, such as landscapes, streets, food, people, buildings, hotels, beaches, mountains, markets, and local life.
Travel photography is not only about famous places. It is also about small details. A cup of coffee near a window, a narrow street, a colorful door, a sunset from your hotel balcony, or a local shop can also make a great travel photo.
The goal of travel photography is to tell a story. Your photos should show what you saw, what you felt, and what made the place special.
Why Travel Photography Matters
Travel photos help you remember your journey. They also help other people understand a place before they visit it. Many travelers use photos for blogs, social media, travel guides, or personal memories.
Good travel photography can make your trip feel more meaningful. When you start noticing light, colors, people, and small details, you enjoy the place more. You stop rushing and start seeing beauty around you.
Travel photography also improves your creative thinking. You learn how to frame a scene, wait for the right moment, and find beauty in simple things.
1. Clean Your Camera Lens Before Taking Photos
This is a very simple tip, but many people forget it. Your phone or camera lens can get dirty from fingers, dust, or moisture. A dirty lens can make your photos look blurry or dull.
Before taking photos, clean the lens with a soft cloth. Do not use rough fabric because it may scratch the lens. If you are using a phone, clean both the back camera and the front camera.
This small step can make a big difference. Your photos will look clearer, sharper, and brighter.
2. Use Natural Light Whenever Possible
Light is one of the most important parts of photography. Good light can make a normal photo look amazing. Bad light can make even a beautiful place look dull.
Natural light is usually best for travel photos. Morning and evening light is soft and warm. It makes skin tones look better and gives landscapes a beautiful glow.
Try to take photos during golden hour. Golden hour is the time after sunrise and before sunset. During this time, sunlight is not too harsh. It creates soft shadows and warm colors.
Avoid taking portraits in strong midday sunlight. It can create hard shadows on the face. If you must take photos at noon, look for shade. A tree, building, or umbrella can help soften the light.
3. Focus on One Main Subject
A good photo usually has one clear subject. The subject can be a person, building, mountain, street, car, food plate, or anything important in the scene.
Before taking the photo, ask yourself, “What do I want people to look at first?” This will help you frame the photo better.
If the photo has too many things, it can look messy. Try to remove distractions from the frame. Move a little left, right, forward, or backward until the subject looks clear.
If you are using a phone, tap on the subject before taking the photo. This helps the camera focus on the right area.
4. Keep the Background Clean
A clean background makes your photo look professional. A messy background can take attention away from the subject.
For example, if you are taking a photo of a person, check what is behind them. Avoid poles, wires, trash bins, or random people directly behind the person’s head.
You do not need an empty background every time. A busy street or market can look beautiful too. But the background should support the story, not ruin it.
Move your subject a little to the side if needed. You can also change your angle to hide unwanted things.
5. Try Different Angles
Most people take photos from eye level. This is fine, but if every photo has the same angle, your travel photos may look boring.
Try low-angle shots. Hold your camera lower and shoot upward. This can make buildings, mountains, and people look powerful.
Try high-angle shots. Shoot from stairs, balconies, bridges, or hills. This works well for city views, food tables, beaches, and streets.
Try side angles for portraits and street photos. You can also take close-up shots of small details like hands, shoes, signs, food, flowers, or travel items.
Changing angles helps you create more interesting photos.
6. Use the Rule of Thirds
The rule of thirds is a simple photography rule. Imagine your photo divided into nine equal parts with two vertical lines and two horizontal lines.
Place your subject near these lines or where the lines meet. This often makes the photo look more balanced and natural.
Most phone cameras have a grid option. Turn on the grid from camera settings. It will help you place your subject better.
For example, if you are taking a photo of a person near the sea, do not always place the person in the center. Place them on the left or right side. This gives the photo more space and style.
7. Do Not Zoom Too Much
Phone zoom can reduce photo quality, especially digital zoom. When you zoom too much, the photo may become blurry or pixelated.
Instead of zooming, move closer to the subject if possible. If you are taking photos of wildlife or faraway objects, use a camera with optical zoom if you have one.
For phone users, take the photo without too much zoom and crop it later if needed. This often gives better results.
8. Capture Real Moments
Some of the best travel photos are natural moments. You do not always need perfect poses. Real smiles, walking shots, laughing moments, street scenes, and local life can make stronger photos.
Take photos while your travel partner is walking, looking at a view, drinking coffee, reading a map, or exploring a street. These photos feel more natural than forced poses.
When you travel, stay ready. Keep your phone or camera easy to reach. Sometimes the best moment lasts only a few seconds.
9. Take Photos Early in the Morning
Morning is one of the best times for travel photography. The light is soft, the streets are calmer, and popular places are less crowded.
If you want clean photos at famous tourist spots, wake up early. You will have more space and better light.
Morning also gives a peaceful feeling to photos. Empty streets, soft sunlight, and fresh colors can make your pictures look special.
This tip is very useful for city travel, beach trips, mountain views, and famous landmarks.
10. Use Leading Lines
Leading lines are lines in a photo that guide the viewer’s eye toward the subject. These lines can be roads, bridges, paths, stairs, rivers, walls, railway tracks, or shadows.
For example, if you are taking a photo on a road, use the road lines to lead the eye toward a person or mountain in the distance.
Leading lines make photos look deeper and more professional. They also help create a strong composition.
When you visit a new place, look for natural lines around you. Roads, streets, fences, and buildings often have great leading lines.
11. Add People to Your Travel Photos
Landscape photos are beautiful, but adding a person can make them more interesting. A person gives scale to the scene. It helps viewers understand how big a mountain, waterfall, building, or beach is.
You do not always need to show the face. A person walking away, standing near a viewpoint, or sitting by the sea can create a strong travel mood.
If you are taking photos for a blog or social media, people can also make the photo feel more personal and relatable.
12. Take Detail Shots
Do not only take wide photos. Detail shots are also important. They help tell the full story of your trip.
Take photos of local food, street signs, doors, windows, bags, maps, tickets, souvenirs, flowers, textures, and traditional items.
Detail shots are useful for travel blogs. They make your article or gallery look more complete. They also help your audience feel the place more closely.
For example, if you visit an old city, do not only take photos of buildings. Capture old door handles, stone walls, lamps, street art, and local shops too.
13. Use Reflections
Reflections can make travel photos look creative. You can find reflections in water, glass windows, mirrors, cars, sunglasses, and wet roads.
After rain, streets often create beautiful reflections. You can use them to capture buildings, lights, people, and city views.
When using reflections, try different angles. Sometimes a small change in position can make the reflection much better.
Reflections are great for creative travel photography because they add depth and style to simple scenes.
14. Keep Your Photos Straight
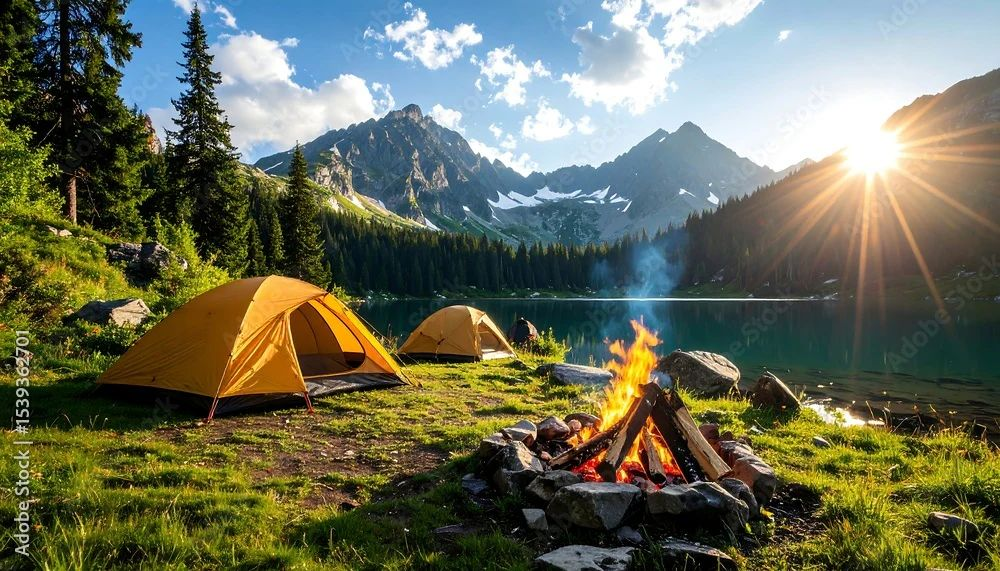
A tilted horizon can make a photo look careless. This happens often in beach, lake, road, and city skyline photos.
Before taking the photo, check if the horizon line is straight. Use the grid on your phone to help.
If the photo is already tilted, you can fix it while editing. Most phone editing apps have a straighten tool.
Straight photos look cleaner and more professional.
15. Learn Basic Editing
Editing can improve your travel photos, but it should not destroy the natural look. The goal is to make the photo better, not fake.
Start with simple edits like brightness, contrast, shadows, highlights, sharpness, and warmth.
Do not overuse filters. Too much editing can make skin look strange and colors look unnatural.
A good edit should feel clean, fresh, and real. Try to keep the original mood of the place.
16. Take Both Vertical and Horizontal Photos
Many people only take vertical photos because they use them for social media. But horizontal photos are also important.
Horizontal photos are great for blogs, website banners, YouTube thumbnails, and landscape views. Vertical photos are good for Instagram stories, reels, Pinterest, and portraits.
When you visit a beautiful place, take both versions. This gives you more options later.
For travel bloggers, this is very important. A horizontal photo may work better as a featured image, while a vertical photo may work better for social media.
17. Tell a Story With Your Photos
Travel photography is not only about one beautiful picture. It is about the full story of your journey.
Try to capture the beginning, middle, and end of your travel day. Take photos of packing, roads, transport, hotel, food, attractions, people, and sunset.
This makes your photo collection more meaningful. When you share your trip, people can feel like they are traveling with you.
A story-based photo collection is also better for blogs. It keeps readers interested and helps them understand your experience.
18. Be Patient
Good photos need patience. Sometimes you need to wait for people to move out of the frame. Sometimes you need to wait for better light. Sometimes you need to try many shots before getting the right one.
Do not rush every photo. Take a moment to look around. Think about the angle, light, background, and subject.
Patience is especially important for sunrise, sunset, street photography, and wildlife photography.
19. Respect Local People and Culture
Travel photography should be respectful. Do not take close photos of people without permission, especially in private or sensitive places.
If you want to photograph a local person, ask politely. A smile and simple gesture can help if you do not speak the same language.
Respect religious places, local rules, and private property. Some places do not allow photography. Always follow the rules.
Good travel photography should never make others uncomfortable.
20. Backup Your Photos
This is one of the most important travel photography tips. Losing travel photos can be very painful.
Back up your photos every day if possible. You can use cloud storage, an external hard drive, or a laptop.
If you use a phone, make sure your photos are synced to cloud storage. If you use a camera, carry extra memory cards.
Do not keep all photos in one place. A phone can be lost. A memory card can stop working. A backup keeps your memories safe.
Best Camera Gear for Travel Photography
You do not need too much gear. Carrying too many items can make travel difficult.
For beginners, a good phone camera is enough. Many modern phones can take excellent travel photos.
If you use a camera, choose something lightweight. A mirrorless camera is often good for travel because it is smaller than many DSLR cameras.
Useful travel photography items include:
- Phone or camera
- Extra battery or power bank
- Memory card
- Small tripod
- Lens cloth
- Camera bag
- Portable light if needed
Keep your gear simple. The best camera is the one you can carry easily and use quickly.
Travel Photography Tips for Phone Users
Phone photography is very powerful now. You can take amazing travel photos with simple phone settings.
Use portrait mode for people. Use wide mode for landscapes. Use night mode in low light. Tap to focus before taking the photo.
Avoid using too much zoom. Keep your phone stable. Clean your lens often.
Use editing apps only for small improvements. A little brightness and sharpness can make your photo better.
Phone cameras are perfect for quick travel moments because they are always with you.
Common Travel Photography Mistakes
Many beginners make simple mistakes. The good thing is that these mistakes are easy to fix.
One common mistake is taking photos in harsh light. Another is not checking the background. Many people also take too many similar photos from the same angle.
Some people over-edit their photos. Others forget to back up their images.
Try to slow down and think before taking photos. A few well-planned photos are better than many random ones.
Quick Travel Photography Checklist
Before taking a travel photo, check these things:
- Is the lens clean?
- Is the light good?
- Is the subject clear?
- Is the background clean?
- Is the photo straight?
- Is there any distraction?
- Can I try a better angle?
- Should I take vertical and horizontal versions?
This simple checklist can improve your photos quickly.
FAQs About Travel Photography Tips
1. Do I need an expensive camera for travel photography?
No, you do not need an expensive camera. You can take great travel photos with a smartphone. Good light, clean composition, and creative angles matter more than expensive gear.
2. What is the best time for travel photography?
The best time is usually early morning or late evening. These times give soft and warm light. This makes photos look natural and beautiful.
3. How can I make my travel photos look professional?
Use natural light, keep the background clean, focus on one subject, use the rule of thirds, and edit lightly. These simple steps can make your photos look better.
4. Should I edit my travel photos?
Yes, but keep editing simple. Adjust brightness, contrast, shadows, and sharpness. Avoid heavy filters that make photos look fake.
5. What should I photograph while traveling?
You can photograph landscapes, streets, food, people, buildings, signs, local markets, hotels, transport, and small details. Try to tell the full story of your trip.
Conclusion
Travel photography is a beautiful way to save your memories and share your journey with others. You do not need expensive gear to take better photos. You only need simple skills and a little practice.
Focus on good light, clean backgrounds, strong subjects, and natural moments. Try different angles and take both wide and detail shots. Edit your photos lightly and always back them up.
The more you practice, the better your travel photos will become. On your next trip, slow down, look around, and capture the moments that feel special to you.